Some friends have been asking for my recipe for the recent photo my wife posted of my apple wine...which is delightful.
Frankly, I was a bit hesitant to write it all down. Not for all the reasons you might suspect, but because this batch was experimental.
But I'm getting ahead of myself.
The back story: Why am I experimenting if I already know how to do this?
Well, that takes us back to my time in the Sandbox, what the expats called Saudi Arabia. A lot of people complained, but really I liked it.
Anyway, since they don't allow alcohol in any form to be bought or sold...well... what shall I say. People take matters into their own hands. Creativity being the mother of invention and all.
Long story short, learning how to make your own home brew is almost a rite of passage or a necessary survival skill. Now - mind you, while many make their own moonshine, just like back in the days of prohibition, most is decidedly NOT good. Some will even make you sick.
I learned from a fellow who had perfected his recipe and made a bottle that was as good as many of the wines I've tasted in France.
Now, the reason I'm experimenting is because -- when I first got back here from the sandbox, I just fired up a batch without considering how the different conditions would affect the outcome... and BOY did they.
It's a bit embarrassing to say, but that first batch was a total bust. While it was delicious at first, it went off very quickly and I was stuck with more than a case of bad wine that had to be thrown out.
Why?
That's the reason for the experiment this time.
Anybody who's ever cooked knows that the conditions like altitude can drastically alter cooking time etc...
And my suspicion is that humidity is at least one of the factors.
So, I've made an ultra small batch.
Is it good?
Of course. It was delightful right after harvest. Now - I'm waiting to see how it holds up. Because wine should get better with time - not worse.
Here's the recipe.
You'll need:
Ingredients:

You'll also need a standard household pot or saucepan, cup and spoon.
That's it.
BUT, the devil is in the details.
First unless you want to stomp grapes (or apples or whatever), you need absolutely pure juice. And unfortunately, that has been hard to find outside Saudi.
There, strangely enough, they wouldn't sell alcohol, but they'd sure sell you everything you needed to make it yourself!
You need juice with no, sugar, no additives, chemicals, preservatives etc... etc... (That's because you only want one organism growing in your wine. And that's yeast. Any thing else will ruin your finest efforts.)
I've tried several. The only one I've found so far that works is a brand called RAUCH.
Here's what it looked like in Saudi,
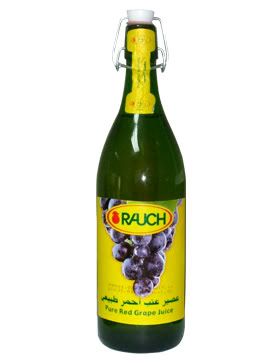
and here's what it looks like here:

If someone else finds another brand that works, please let me know.
Next:
Sterilization:
You need to clean, scrub and get everything spotlessly spic and span. That includes your barrel or pitcher, bottles and every utensil, pot and pan you'll use.
Exception. IF you are able to find the juice in the resealable bottles, no washing or sterilization is necessary. Just rinse in hot water and store upside down on a clean cloth to absorb all the water in a clean, dry place.
But if you buy your resealable bottle from someplace like Ace Hardware (where I got mine recently), you definitely must wash and sterilize.
Barrel: Wash and sterilize every inch.
Ditto for your pot, cup and spoon.
Everything hospital clean?
Put your barrel elevated off the floor if possible, then pour all but one cup of juice into your barrel or pitcher. (You'll need it for your starter.)
Leave open to breathe.
Prepare your sugar solution:
I use 1 cup of sugar for every 12 liters of juice.
For one cup of sugar, you'll need a couple liters of water.
Boil water and add the sugar while stirring so it dissolves.
Prepare you starter:
Take one cup of juice. Add 1 tablespoon of sugar.
Heat mixture in microwave until it's hot to the touch. If it's too hot to touch - it's too hot. Let it cool down a little.
Add an 1/4 of a teaspoon of sugar for every 12 liters of juice.
It should start to react. Ideally you want to see it get very active. At least you should see
the yeast begin to move about.
Leave your starter...
Ready, Set....?
Pour your sugar solution into the barrel.
Do NOT stir.
After your starter solution has reacted and hopefully formed a foamy, frothy top, pour into the barrel.
Put the lid, loosely on. You want it to be on enough to keep any bugs or dust out, but allow enough room for air to pass in and out.
Leave for 6 weeks in a clean, dark, ventilated room.
Do NOT move.
After 6 weeks, remove lid and check. It should not smell of yeast. And the foam should all be gone.
If it still smells of yeast, leave it for another 3-4 days and check again.
Ready for harvest - the bottling?
When it smells and looks right, clean and sterilize that plastic tube - inside and out.
Get out your bottles.
Remove the lid of the barrel.
You'll want to do the bottling where you don't mind spilling a little wine.
A spare bathroom with a floor drain is ideal.
Make sure the barrel is higher than the bottles. (Gravity to make the wine flow...)
Insert the tube a few inches down into the barrel.
Do NOT push it all the way to the bottom or you'll get all the dregs. Yuk!
You'll need to suck on the other end of the tube to start the flow.
Fill each bottle while watching the clarity of your wine.
STOP as soon as the color becomes the least bit cloudy. You're done.
That last bottle will be your table wine, not your best stuff.
What's left in the barrel should be a few inches of dregs. Toss it and savor your
first wine.
Back to the experiment:
So, I am trying to figure out what will work now that I'm somewhere very different than the Sandbox. There it was dry and hot. Here it is humid and hot.
There I was able to have constant temperature, excellent ventilation and total darkness through out the gestation period.
Here the conditions are not quite as ideal. So, I want to find out
1. Does the humidity constitute a degrading factor I can't do anything about? or
2. Can I make adjustments in the gestation period that will produce a great wine.
It's already been a couple weeks since the I bottled my ultra small batch. (1.5 liters yield).
I will update this later with the results when it's been a month.
Thanks for reading.
Enjoy.
THE PROMISED UPDATE:
OK. It's been a little over a month. 33 days I think.
I am happy to report, the Apple Wine is holding up beautifully!
It has mellowed and become very smooth. It even has a hint of sweetness.
I'm very satisfied.
Now, here are a few details I left out above.
Details:
In Saudi, the wine spent 6 weeks in a room with a constant ambient temperature of about 24C. Here, during the 6 weeks of gestation it was in a room that is air-conditioned about 21 hours a day. So - you can imagine the fluctuation. Not ideal.
And...
I found that once I had bottled it, it still needed more time before drinking. Anyway, I don't remember how, but I ended up putting that bottle in the kitchen -- which is not air conditioned and probably about 30C most of the time. But day-by-day and week by week it has improved.
My Conclusion?
The humidity slows down the gestation process while the heat speeds it up.
So, next batch, I will let the wine gestate in a non air-conditioned room. Then I will begin checking on it after about 3-4 weeks and bottle it when it smells and looks right.
If for some reason that doesn't work, I'll try go back to the air conditioned room on the next round and let it gestate 7 or 8 weeks before bottling.
And if that doesn't work -- I can always just go back to what worked this time -- essentially a
2 Step process of 6 weeks with AC and 1 month in the kitchen after bottling.
One last thing...
Tips:
Yield: Whatever amount of grape juice you start with, the amount of wine you end up with will usually be about 80%.
So, if you start with 12 liters, don't expect more than 9 or 10 (1 liter) bottles of wine.
Red, White and Rose: This time I made apple wine because the shops simply haven't been stocking the grape juice lately.
But if you prefer red wine, just use the red grape juice. For white wine the white grape juice. And if you like rose - mix half and half.
That will be one of my next projects. The rose is actually one of my favorites.
Other than grape or apple? You might be wondering if any other juices will work. The answer is I think so...
You see, in theory, any fruit juice which has its own natural sugars should work, but once in Saudi I tried orange juice: A total disaster!
So, it MIGHT work. But my guess is, any kind of citrus will NOT work. There's simply too much acid.
On the other hand, I think almost any berry or pome (apples, pears) or drupe (peaches, plum, coconut) should produce a very satisfying wine.
I think I'll try making one of these...
How bout you?
You can send questions or comments to:sukkiri2000-wine@yahoo.com
Cheers,
Tj
Frankly, I was a bit hesitant to write it all down. Not for all the reasons you might suspect, but because this batch was experimental.
But I'm getting ahead of myself.
The back story: Why am I experimenting if I already know how to do this?
Well, that takes us back to my time in the Sandbox, what the expats called Saudi Arabia. A lot of people complained, but really I liked it.
Anyway, since they don't allow alcohol in any form to be bought or sold...well... what shall I say. People take matters into their own hands. Creativity being the mother of invention and all.
Long story short, learning how to make your own home brew is almost a rite of passage or a necessary survival skill. Now - mind you, while many make their own moonshine, just like back in the days of prohibition, most is decidedly NOT good. Some will even make you sick.
I learned from a fellow who had perfected his recipe and made a bottle that was as good as many of the wines I've tasted in France.
Now, the reason I'm experimenting is because -- when I first got back here from the sandbox, I just fired up a batch without considering how the different conditions would affect the outcome... and BOY did they.
It's a bit embarrassing to say, but that first batch was a total bust. While it was delicious at first, it went off very quickly and I was stuck with more than a case of bad wine that had to be thrown out.
Why?
That's the reason for the experiment this time.
Anybody who's ever cooked knows that the conditions like altitude can drastically alter cooking time etc...
And my suspicion is that humidity is at least one of the factors.
So, I've made an ultra small batch.
Is it good?
Of course. It was delightful right after harvest. Now - I'm waiting to see how it holds up. Because wine should get better with time - not worse.
Here's the recipe.
You'll need:
Ingredients:
- PURE, 100% juice without any additives or preservatives.
- Bakers yeast.
- Household sugar. (Nothing special, just the normal white stuff.)
- 2-3 meters of small plastic hose with diameter small enough to fit into the neck of a wine bottle.
- A plastic barrel or other pitcher-like container (depending on the size of batch you're making.)
- Resealable wine bottles. They look like this.
You'll also need a standard household pot or saucepan, cup and spoon.
That's it.
BUT, the devil is in the details.
First unless you want to stomp grapes (or apples or whatever), you need absolutely pure juice. And unfortunately, that has been hard to find outside Saudi.
There, strangely enough, they wouldn't sell alcohol, but they'd sure sell you everything you needed to make it yourself!
You need juice with no, sugar, no additives, chemicals, preservatives etc... etc... (That's because you only want one organism growing in your wine. And that's yeast. Any thing else will ruin your finest efforts.)
I've tried several. The only one I've found so far that works is a brand called RAUCH.
Here's what it looked like in Saudi,
and here's what it looks like here:
If someone else finds another brand that works, please let me know.
Next:
Sterilization:
You need to clean, scrub and get everything spotlessly spic and span. That includes your barrel or pitcher, bottles and every utensil, pot and pan you'll use.
Exception. IF you are able to find the juice in the resealable bottles, no washing or sterilization is necessary. Just rinse in hot water and store upside down on a clean cloth to absorb all the water in a clean, dry place.
But if you buy your resealable bottle from someplace like Ace Hardware (where I got mine recently), you definitely must wash and sterilize.
Barrel: Wash and sterilize every inch.
Ditto for your pot, cup and spoon.
Everything hospital clean?
Put your barrel elevated off the floor if possible, then pour all but one cup of juice into your barrel or pitcher. (You'll need it for your starter.)
Leave open to breathe.
Prepare your sugar solution:
I use 1 cup of sugar for every 12 liters of juice.
For one cup of sugar, you'll need a couple liters of water.
Boil water and add the sugar while stirring so it dissolves.
Prepare you starter:
Take one cup of juice. Add 1 tablespoon of sugar.
Heat mixture in microwave until it's hot to the touch. If it's too hot to touch - it's too hot. Let it cool down a little.
Add an 1/4 of a teaspoon of sugar for every 12 liters of juice.
It should start to react. Ideally you want to see it get very active. At least you should see
the yeast begin to move about.
Leave your starter...
Ready, Set....?
Pour your sugar solution into the barrel.
Do NOT stir.
After your starter solution has reacted and hopefully formed a foamy, frothy top, pour into the barrel.
Put the lid, loosely on. You want it to be on enough to keep any bugs or dust out, but allow enough room for air to pass in and out.
Leave for 6 weeks in a clean, dark, ventilated room.
Do NOT move.
After 6 weeks, remove lid and check. It should not smell of yeast. And the foam should all be gone.
If it still smells of yeast, leave it for another 3-4 days and check again.
Ready for harvest - the bottling?
When it smells and looks right, clean and sterilize that plastic tube - inside and out.
Get out your bottles.
Remove the lid of the barrel.
You'll want to do the bottling where you don't mind spilling a little wine.
A spare bathroom with a floor drain is ideal.
Make sure the barrel is higher than the bottles. (Gravity to make the wine flow...)
Insert the tube a few inches down into the barrel.
Do NOT push it all the way to the bottom or you'll get all the dregs. Yuk!
You'll need to suck on the other end of the tube to start the flow.
Fill each bottle while watching the clarity of your wine.
STOP as soon as the color becomes the least bit cloudy. You're done.
That last bottle will be your table wine, not your best stuff.
What's left in the barrel should be a few inches of dregs. Toss it and savor your
first wine.
Back to the experiment:
So, I am trying to figure out what will work now that I'm somewhere very different than the Sandbox. There it was dry and hot. Here it is humid and hot.
There I was able to have constant temperature, excellent ventilation and total darkness through out the gestation period.
Here the conditions are not quite as ideal. So, I want to find out
1. Does the humidity constitute a degrading factor I can't do anything about? or
2. Can I make adjustments in the gestation period that will produce a great wine.
It's already been a couple weeks since the I bottled my ultra small batch. (1.5 liters yield).
I will update this later with the results when it's been a month.
Thanks for reading.
Enjoy.
THE PROMISED UPDATE:
OK. It's been a little over a month. 33 days I think.
I am happy to report, the Apple Wine is holding up beautifully!
It has mellowed and become very smooth. It even has a hint of sweetness.
I'm very satisfied.
Now, here are a few details I left out above.
Details:
In Saudi, the wine spent 6 weeks in a room with a constant ambient temperature of about 24C. Here, during the 6 weeks of gestation it was in a room that is air-conditioned about 21 hours a day. So - you can imagine the fluctuation. Not ideal.
And...
I found that once I had bottled it, it still needed more time before drinking. Anyway, I don't remember how, but I ended up putting that bottle in the kitchen -- which is not air conditioned and probably about 30C most of the time. But day-by-day and week by week it has improved.
My Conclusion?
The humidity slows down the gestation process while the heat speeds it up.
So, next batch, I will let the wine gestate in a non air-conditioned room. Then I will begin checking on it after about 3-4 weeks and bottle it when it smells and looks right.
If for some reason that doesn't work, I'll try go back to the air conditioned room on the next round and let it gestate 7 or 8 weeks before bottling.
And if that doesn't work -- I can always just go back to what worked this time -- essentially a
2 Step process of 6 weeks with AC and 1 month in the kitchen after bottling.
One last thing...
Tips:
Yield: Whatever amount of grape juice you start with, the amount of wine you end up with will usually be about 80%.
So, if you start with 12 liters, don't expect more than 9 or 10 (1 liter) bottles of wine.
Red, White and Rose: This time I made apple wine because the shops simply haven't been stocking the grape juice lately.
But if you prefer red wine, just use the red grape juice. For white wine the white grape juice. And if you like rose - mix half and half.
That will be one of my next projects. The rose is actually one of my favorites.
Other than grape or apple? You might be wondering if any other juices will work. The answer is I think so...
You see, in theory, any fruit juice which has its own natural sugars should work, but once in Saudi I tried orange juice: A total disaster!
So, it MIGHT work. But my guess is, any kind of citrus will NOT work. There's simply too much acid.
On the other hand, I think almost any berry or pome (apples, pears) or drupe (peaches, plum, coconut) should produce a very satisfying wine.
I think I'll try making one of these...
How bout you?
You can send questions or comments to:sukkiri2000-wine@yahoo.com
Cheers,
Tj
No comments:
Post a Comment